In the most recent versions of macOS, OpenGL has been replaced by Metal but it can still be used and some old engines still rely on OpenGL. But how to use OpenGL on Apple Silicon ? There are many libraries out there, the one we’re going to use is called GLFW with native support for the ARM architecture.
LearnOpenGL already lists all the necessary steps to create a window, but the process on macOS is a bit different and not much is explained in greater details especially for XCode. If you don’t want to compile the library source code and use directly the pre-compiled binaries for macOS, but I highly encourage you to compile the library by yourself, as already stated on LearnOpenGL you might want to do this because:
Compiling the library from the source code guarantees that the resulting library is perfectly tailored for your CPU/OS, a luxury pre-compiled binaries don’t always provide (sometimes, pre-compiled binaries are not available for your system).
We’re also going to see another method which involves compiling the code through Clang and install GLFW with HomeBrew.
Generate a XCode project to compile GLFW using CMake
First step is to download the source package for GLFW, next download and install CMake, which simply is a tool to generate all the files you need for a project by choosing the IDE you want to use, in our current scenario we want to create a project for XCode.
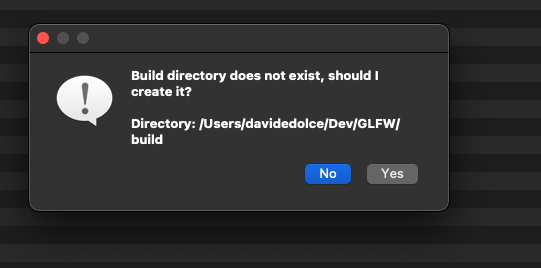
After opening CMake, select the path of your GLFW directory which needs to be the root folder and create a build folder, click on Configure and select XCode. If you don’t create a build folder, CMake will ask you to create it).
Select XCode and use the default options to configure the project:
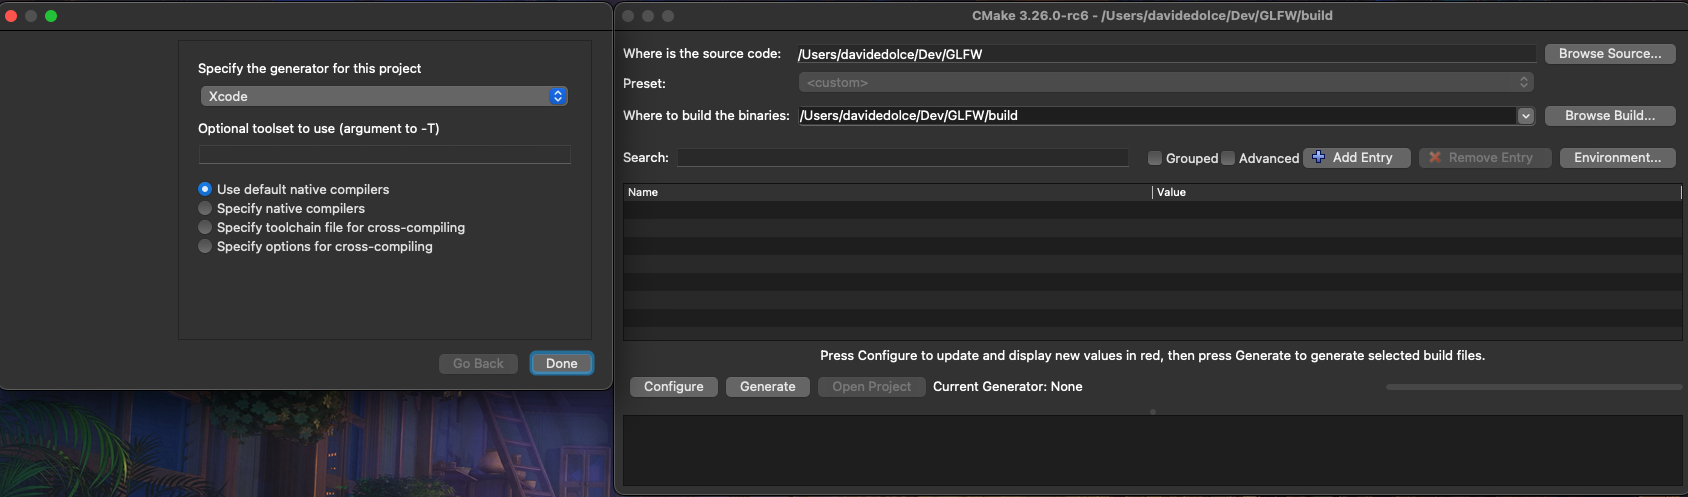
It is not really required, but CMake might complain because of a missing tool named doxygen missing, if that’s the case simply install it with HomeBrew:
brew install doxygen
You should get the following window:
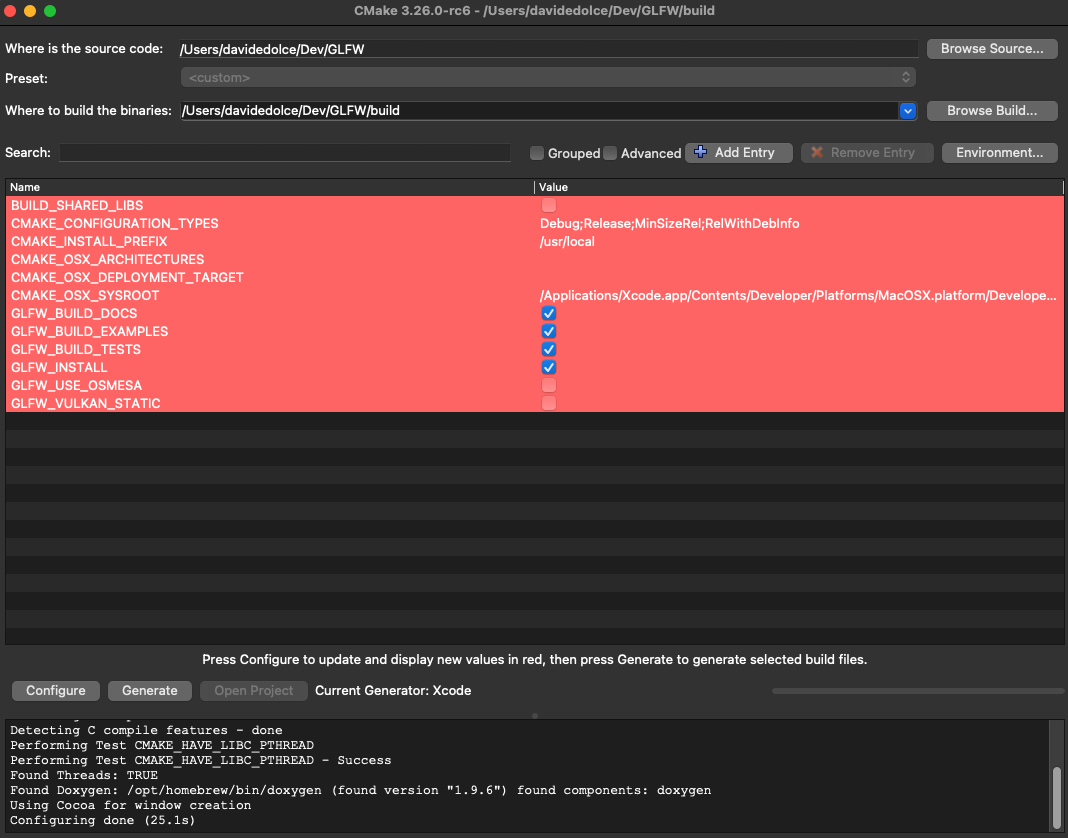
Before pressing Generate we’re interested in the first option “BUILD_SHARED_LIBS”, if selected, it will will generate a dylib which stands for dinamic library in macOS. If it is not selected it will generate a static library with an extension .a so for now let’s select the option to get a dylib after the compilation is done!
After pressing Generate you should find a new build folder in the path you chose and a GLFW.xcodeproj containing our XCode project. So for instance you should have:
/Users/your username/Dev/GLFW/build
Compile GLFW with XCode
Open the generated XCode project and select the scheme install (which should already be selected by default):

and press SHIFT + CMD + B to compile the whole project. We can find the dylib in the following path in the Debug directory built by XCode (we’ll repeat the same step later for the static library):
/Users/your username/Dev/GLFW/build/src/Debug
Create a new XCode project to display a window using a dylib
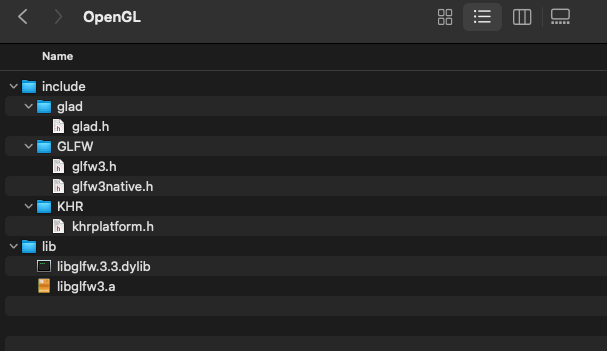
In the output directory, we’re only interested about the dylib file (we don’t care about the aliases) and since dealing with many third party libraries and headers can be a bit messy, we create a folder to share all these files in one single place as also specified on LearnOpenGL. Something like this (don’t worry we’ll get the other files we need later):
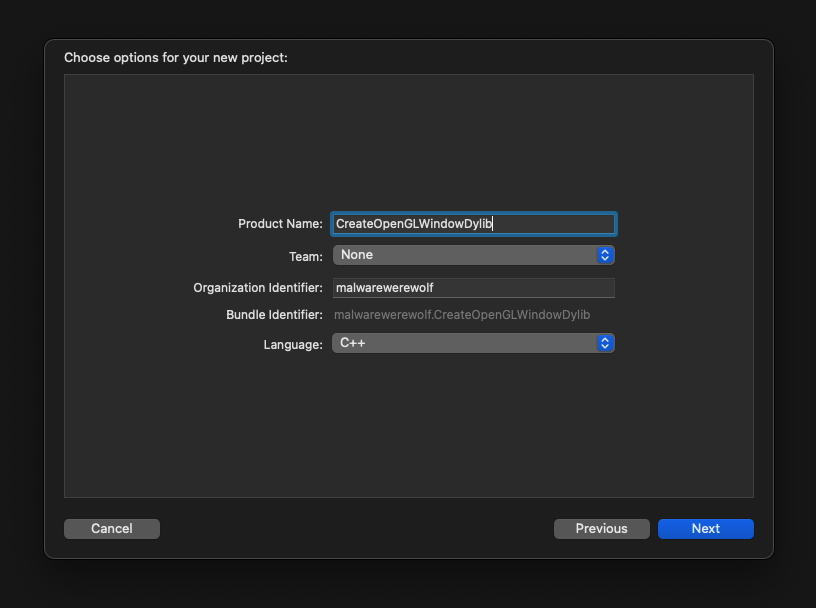
Create a new XCode project selecting Command Line Tool as a template and select C++ as language:
We’re going to use the following code for our main.cpp file, I will not explain what the code does since there’s already a great explanation on LearnOpenGL:
#include <glad/glad.h>
#include <GLFW/glfw3.h>

#include <iostream>

void framebuffer_size_callback(GLFWwindow* window, int width, int height);
void processInput(GLFWwindow *window);

// settings
const unsigned int SCR_WIDTH = 800;
const unsigned int SCR_HEIGHT = 600;

int main()
{
    // glfw: initialize and configure
    // ------------------------------
    glfwInit();
    glfwWindowHint(GLFW_CONTEXT_VERSION_MAJOR, 3);
    glfwWindowHint(GLFW_CONTEXT_VERSION_MINOR, 3);
    glfwWindowHint(GLFW_OPENGL_PROFILE, GLFW_OPENGL_CORE_PROFILE);

#ifdef __APPLE__
    glfwWindowHint(GLFW_OPENGL_FORWARD_COMPAT, GL_TRUE);
#endif

    // glfw window creation
    // --------------------
    GLFWwindow* window = glfwCreateWindow(SCR_WIDTH, SCR_HEIGHT, "LearnOpenGL", NULL, NULL);
    if (window == NULL)
    {
        std::cout << "Failed to create GLFW window" << std::endl;
        glfwTerminate();
        return -1;
    }
    glfwMakeContextCurrent(window);
    glfwSetFramebufferSizeCallback(window, framebuffer_size_callback);

    // glad: load all OpenGL function pointers
    // ---------------------------------------
    if (!gladLoadGLLoader((GLADloadproc)glfwGetProcAddress))
    {
        std::cout << "Failed to initialize GLAD" << std::endl;
        return -1;
    }

    // render loop
    // -----------
    while (!glfwWindowShouldClose(window))
    {
        // input
        // -----
        processInput(window);

        // render
        // ------
        glClearColor(0.2f, 0.3f, 0.3f, 1.0f);
        glClear(GL_COLOR_BUFFER_BIT);

        // glfw: swap buffers and poll IO events (keys pressed/released, mouse moved etc.)
        // -------------------------------------------------------------------------------
        glfwSwapBuffers(window);
        glfwPollEvents();
    }

    // glfw: terminate, clearing all previously allocated GLFW resources.
    // ------------------------------------------------------------------
    glfwTerminate();
    return 0;
}

// process all input: query GLFW whether relevant keys are pressed/released this frame and react accordingly
// ---------------------------------------------------------------------------------------------------------
void processInput(GLFWwindow *window)
{
    if(glfwGetKey(window, GLFW_KEY_ESCAPE) == GLFW_PRESS)
        glfwSetWindowShouldClose(window, true);
}

// glfw: whenever the window size changed (by OS or user resize) this callback function executes
// ---------------------------------------------------------------------------------------------
void framebuffer_size_callback(GLFWwindow* window, int width, int height)
{
    // make sure the viewport matches the new window dimensions; note that width and
    // height will be significantly larger than specified on retina displays.
    glViewport(0, 0, width, height);
}
We need a couple of things to make our code fully functional, following the LearnOpenGL tutorial, we need to set GLAD a Vulkan/GL/GLES/EGL/GLX/WGL Loader-Generator based on the official specifications for multiple languages. As quoted on LearnOpenGL we need this generator because:
OpenGL is only really a standard/specification it is up to the driver manufacturer to implement the specification to a driver that the specific graphics card supports. Since there are many different versions of OpenGL drivers, the location of most of its functions is not known at compile-time and needs to be queried at run-time. It is then the task of the developer to retrieve the location of the functions he/she needs and store them in function pointers for later use. Retrieving those locations is OS-specific.
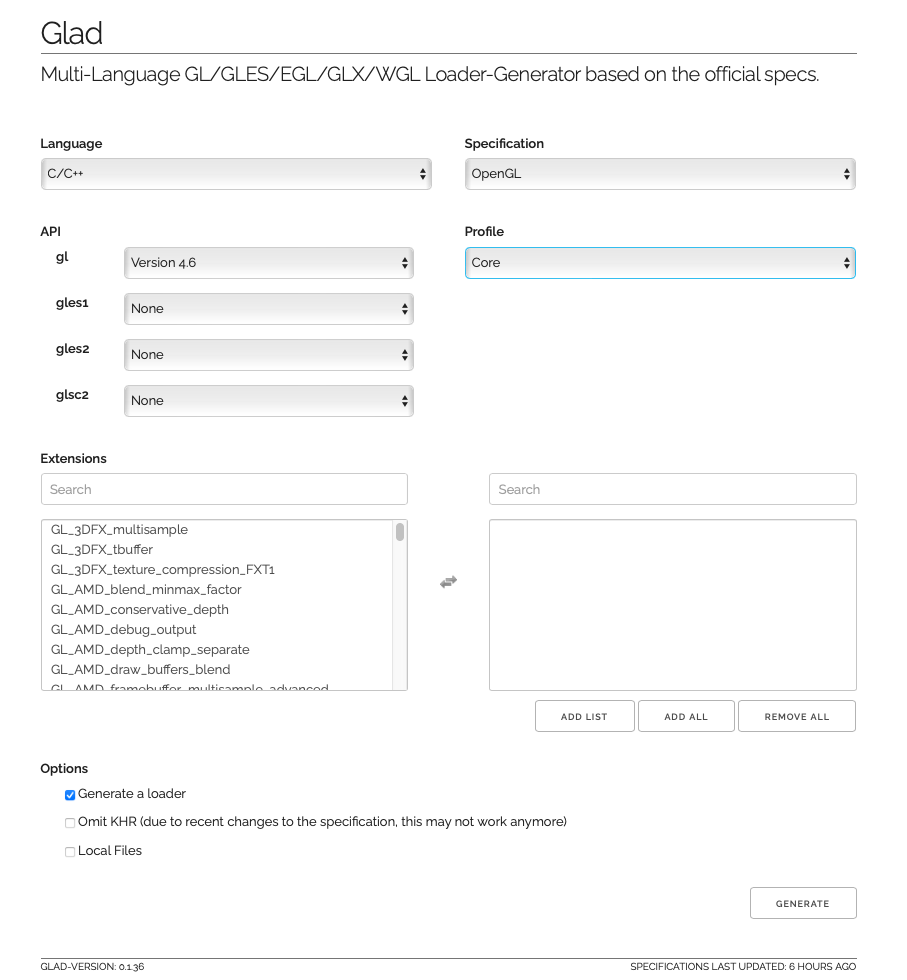
The code we need for the header glad.h can be generated through a web service which will also generate the cpp file we need to use in our XCode project. You can use a version of OpenGL from 3.3 up to the most recent with the following settings:
Click on Generate to download a zip file containing two include folders, and a single glad.c file. Put the files inside the two include folders in your OpenGL directory, the one to share the libraries and the headers across other projects. I have the files in a path like:
/Users/your username/Dev/OpenGL
We also need glfw3.h to be copied inside the include folder of your OpenGL directory or the code will not compile, we can find this header inside the include folder of the source package we downloaded before:
/Users/your username/Dev/GLFW/include/GLFW/glfw3.h
And put it in:
/Users/your username/Dev/OpenGL/include
Add glad.c to your XCode project, at this point we need to update the Build Settings and Build Phases of our XCode project to both use the dylib and where to find the headers. In your project navigator, click on the top icon which will open the .xcodeproj to update (rememeber to select the Target which is our console application not the Project), click on Build Settings and look for these two entries in the Search Paths build setting:
- Header Search Paths
- Library Search Paths
Here we need to add the paths of our directories, you can set them to be non-recursive but you have to put every single folder you want to be included in your project separetely. In this case, we can set it to be recursive since we’re insterested in all files in the OpenGL folder. You should have the following settings in your project after the changes:

Now we need to go the Build Phases tab and add libglfw.3.3.dylib like so:

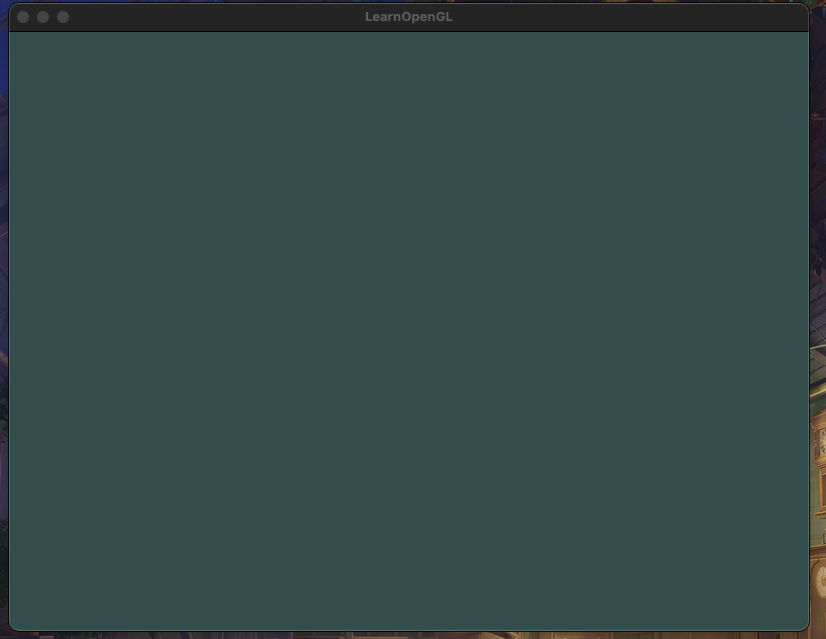
Hit SHIFT + CMD + B and run the project:
Create a new XCode project to display a window using a static library
For the static library it’s almost the same process, you need first to generate again the XCode project using CMake to compile the source package, remember to unselect the “BUILD_SHARED_LIBS” so it will compile the static library.
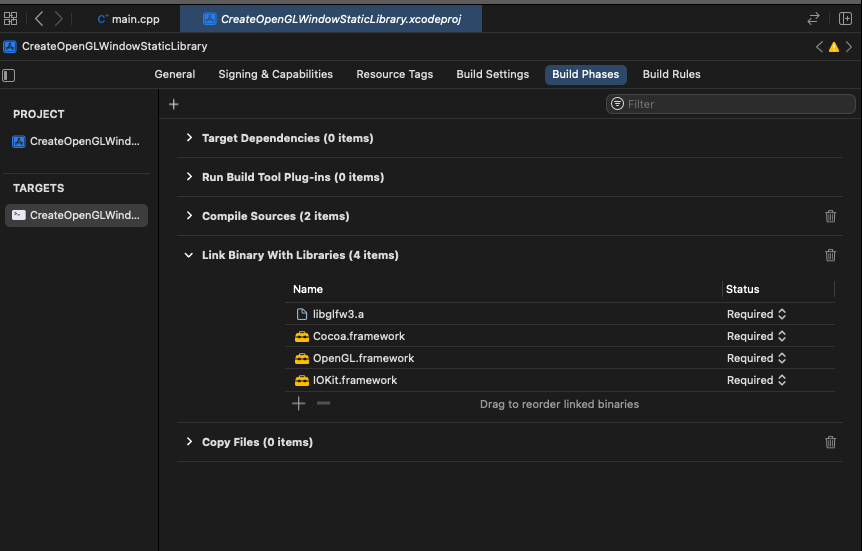
After libglfw3.a has been generated, put this file in your OpenGL directory inside the lib folder. The XCode project is almost the same but this time instead of linking a dylib in the Build Phases tab, we’re going to link the static library, the Cocoa, OpenGL and IOKit frameworks:
It’s also possible to do the same without linking manually the libraries in Build Phases, in fact we just need to set another property in the Build Settings to use some command line parameters. So simply set this entry in this way without linking any libraries in the Build Phases:
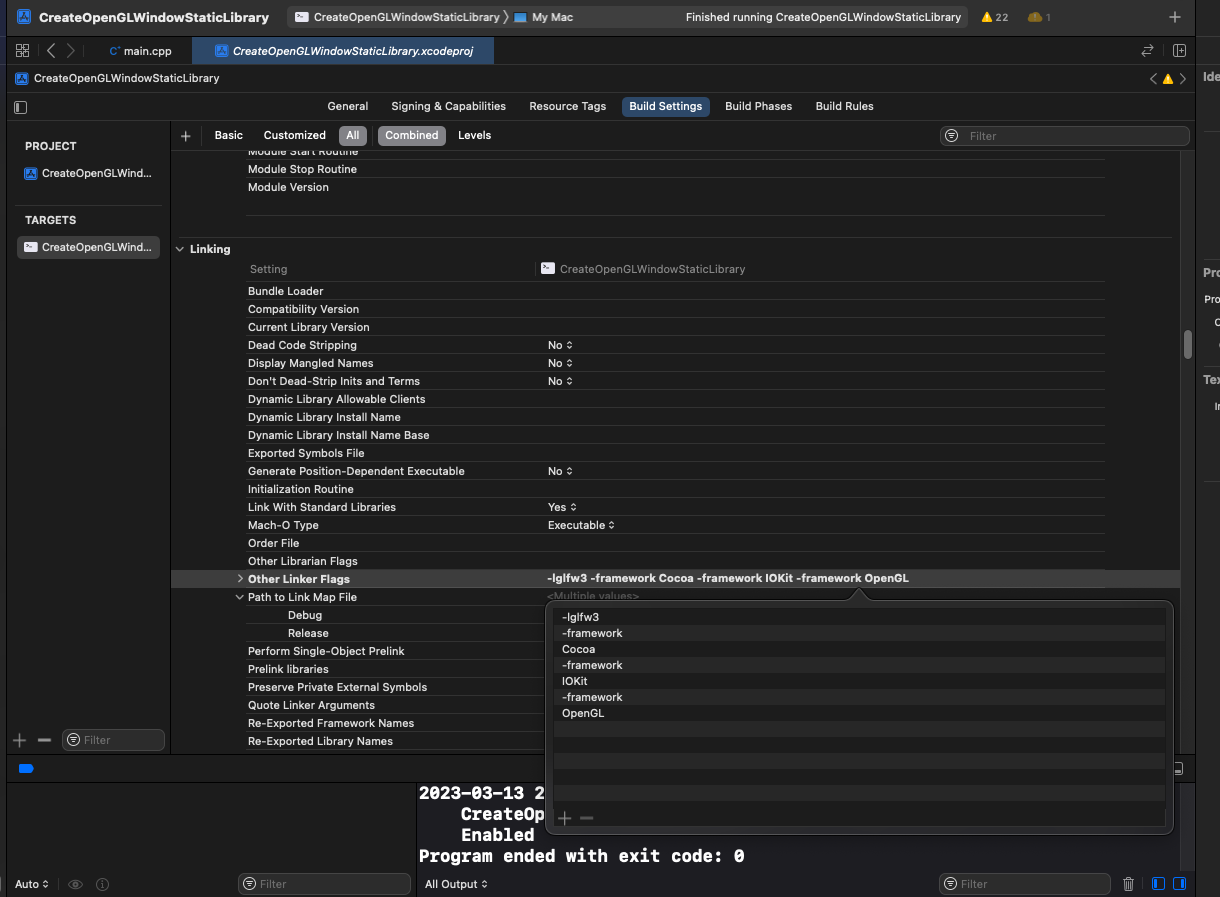
It’s practically the same as using the command line to compile the code with Clang by adding the required libraries and frameworks:
clang++ -o main main.cpp -lglfw3 -framework Cocoa -framework OpenGL -framework IOKit
Compile the code with Clang and install GLFW with HomeBrew
We learned how to create link a dylib and static library in XCode, but there’s another way to run our code through the terminal and since we’re using HomeBrew, we just need to install the package to get everything we need:
brew install glfw
And by doing so, we can skip the steps where we compiled the source package. I created a repository with the source code I used which is basically the same as the one used for XCode, the only small difference is that we’re using a makefile to generate everything we need from the project since it would probably be complicate to run many long commands in the terminal so instead, we let make doing the job for us. This is the makefile I used:
C_FLAGS := -g -Wall -Wextra
CC := clang++
RM := rm
LINKFLAGS := -lglfw3 -framework OpenGL -framework IOKit -framework Cocoa

.PHONY: $(TARGET)
.PHONY: clean

VPATH:= ./src/ ./obj/ ./include/

# Path for .c , .h and .o Files
SRC_PATH := ./src/
OBJ_PATH := ./obj/
INC_PATH := -I ./include

# Executable Name
TARGET := start

# Files to compile
OBJ1 := glad.o \
        main.o

OBJ := $(patsubst %,$(OBJ_PATH)%,$(OBJ1))

# Build .o first
$(OBJ_PATH)%.o: $(SRC_PATH)%.*
				mkdir -p $(@D)
				@echo [CC] $<
				@$(CC) $(C_FLAGS) -o $@ -c $< $(INC_PATH)

# Build final Binary
$(TARGET):		$(OBJ)
				@echo [INFO] Creating Binary Executable [$(TARGET)]
				@$(CC) -o $@ $^ $(LINKFLAGS)

# Clean all the object files and the binary
clean:
				@echo "[Cleaning]"
				@$(RM) -rfv $(OBJ_PATH)*
				@$(RM) -rfv $(TARGET)
Clone the repository and in the terminal, type make in the root folder of the project. After that there should be a file named start, just run it by typing ./start.
TLDR
Compiling the code with Clang and make was fairly simple unlike setting everything with XCode but now you should know how to compile the source code from a library, which can be useful for the reasons I explained before! LearnOpenGL is a great source to learn OpenGL even though for macOS only a few things are explained and the process to get everything working is a bit complicate, but if you have any issues with the code in the next chapters of LearnOpenGL, you can always check the Github repo which contains a small guide to compile the code in the terminal and create a XCode project!