On the arm64 architecture and macOS, there are not many ways to inject some code into an application, luckily there’s a tool called Frida which not only serves that purpose but it also allows you to reverse-engineering apps. Frida’s documentation give you some examples to start using the tool, however I had a few issues when running the tool on macOS which we’re going to see shortly.
Requirements
Installing Frida with python is very straight forward, latest 3.x is recommended. Simply run this command in the terminal to install everything we need:
$ pip install frida frida-tools
Some cool websites and videos to mention while learning Frida
- LearnFrida
- Frida documentation
- Awesome Frida
- Wtf is Frida ?
- OBTS v4.0: “iOS Reverse Engineering With Frida” - Christine Fossaceca
A word about SIP (system integrity protection)
Frida docs recommends to disable the SIP in macOS, although is not really recommended as quoted on the Apple developer documentation:
Disable SIP only temporarily to perform necessary tasks, and reenable it as soon as possible. Failure to reenable SIP when you are done testing leaves your computer vulnerable to malicious code.
But that isn’t the only issue, in fact if you disable the SIP, many other apps will stop working until you renable it. There’s a workaround we can use to bypass the SIP, keep in mind this bypass (if you want to call it that way) is not going to work on every application. In that case, disabling the SIP is the only option you have at your disposal.
Overwrite the signature of an application
Unlike Linux or Windows, each app on macOS has its own signature and without it, the app cannot run and because of the signature, you can’t really attach Frida to all processes, since you will get an error like:

So what happens if we attempt to override the signature using a command from the terminal called codesign ? Make a copy of the application before launching it, we need the application executable the one inside the MacOS folder, we can get to this folder by right clicking on the application and clicking on Show Package Contents:
$ sudo codesign -f -s - /apps/Firefox2.app/Contents/MacOS/firefox
and now if we type again:
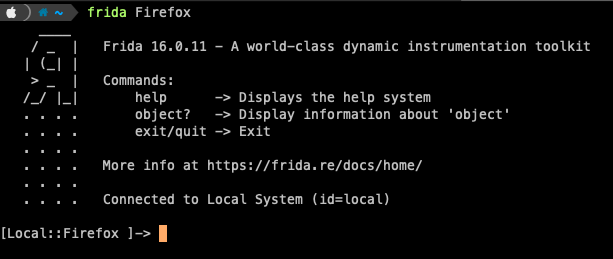
$ frida firefox
we can attach Frida to Firefox:
But wait why is it working now ? If we compare the signature of the two apps, the real one and the copy using the command:
$ codesign -dv /apps/Firefox.app
we can see there are some small differences, for Firefox (the unmodified signature) we have:
Executable=/apps/Firefox.app/Contents/MacOS/firefox
Identifier=org.mozilla.firefox
Format=app bundle with Mach-O universal (x86_64 arm64)
CodeDirectory v=20500 size=863 flags=0x10000(runtime) hashes=18+5 location=embedded
Signature size=8988
Timestamp=21 Mar 2023 at 13:58:54
Info.plist entries=25
TeamIdentifier=43AQ936H96
Runtime Version=13.0.0
Sealed Resources version=2 rules=13 files=80
Internal requirements count=1 size=148
and for the copy we have:
Executable=/apps/Firefox2.app/Contents/MacOS/firefox
Identifier=org.mozilla.firefox
Format=app bundle with Mach-O universal (x86_64 arm64)
CodeDirectory v=20400 size=780 flags=0x2(adhoc) hashes=18+3 location=embedded
Signature=adhoc
Info.plist entries=25
TeamIdentifier=not set
Sealed Resources version=2 rules=13 files=80
Internal requirements count=0 size=12
We’re interested in the property Signature=adhoc, on the documentation it says:
The code has been sealed without a signing identity. No identity may be retrieved from it, and any code requirement placing restrictions on the signing identity will fail. This flag is set by Code Signing Services when you create an ad-hoc signature, and cannot be set explicitly. An ad-hoc signature is created by signing with the pseudo-identity “-” (a dash).
It basically means that the binary is the same as non-signed, so it won’t pass through any kind of verification. As I already mentioned this won’t be possible on every application, if that’s the case disabling the SIP might fix the issue.
Protected parts of the system
Some apps like Safari don’t even need a new signature and you can easily attach Frida to them. It also depends where the app you want to debug is located, as stated on the Apple documentation, System Integrity Protection includes protection for these parts of the system:
- /System
- /usr
- /bin
- /sbin
- /var
- Apps that are pre-installed with the Mac operating system
Paths and apps that third-party apps and installers can continue to write to include:
- /Applications
- /Library
- /usr/local
And the documentation also says:
System Integrity Protection is designed to allow modification of these protected parts only by processes that are signed by Apple and have special entitlements to write to system files, such as Apple software updates and Apple installers. Apps that you download from the App Store already work with System Integrity Protection. Other third-party software, if it conflicts with System Integrity Protection, might be set aside when you upgrade to OS X El Capitan or later.
So what this means is that all the authorized apps by Apple can write, some parts of the system, all the other apps can simply write to folders such as Applications but why are we interested in these protected folders ? Some of the pre-installed apps like Calculator or Maps, are accessible through the Applications folder but they are actually located in System:
- for Calculator the path is
/System/Applications/Calculator.app - for Maps the path is
/System/Applications/Maps.app
And with the SIP enabled, you can’t attach Frida to these system apps, Safari is an exception even if it’s a pre-installed app since it’s in a different path. To attach Frida to Safari, you need to use the correct PID, in fact if you type:
$ frida Safari
you will get an error where there are two processes with the same name:
Failed to spawn: ambiguous name; it matches: safari (pid: 2296), Safari (pid: 2270)
pick one of the two PIDs, it’s usually the first one and type:
$ frida 2296
and Frida will attach correctly to the process.
Frida CLI
All the Frida commands you can use are listed in the documentation, the one you’re probably going to use the most is frida-ps, which is useful for listing processes on the current or even a remote system. But if you just type frida-ps in the terminal you will get a lot of results, so to filter only what you’re looking for you can use grep:
$ frida-ps | grep Safari
Another command worth to mention is frida-trace which is a tool for dynamically tracing function calls. Depending on the OS you’re targeting, functions can be called differently, in Objective-C case to use its functions, you would use a command like the following (I’m using OpenGothic as an example):
$ frida-trace -f "/Applications/OpenGothic.app/Contents/MacOS/Gothic2Notr" -m "-[NSApplication **]"
In this case, NSApplication is an Objective-C function.
Objective-C functions
It’s not mandatory to be a Objective-C guru, but it certaintly help to understand a bit the language to use the functions in Frida. A good place to start learning about the Objective-C functions is to check the documentation. In order to inject some code, Frida is using Javascript, after attaching Frida to a process to invoke a function you would write something like:
ObjC.classes.NSString.stringWithString_("Hello World");
The underscore after the method name is used to replace : so for instance in Objective-C, you would write:
stringWithString:
on the other hand in Frida, you replace the character with _:
stringWithString_
All the syntax is very well explained on the Frida documentation for Objective-C using Javascript.
Injecting code into an application
The code used to be injected in the processes is using Javascript and Python is used to set all the stuff you need, like the process to inject the code and the actual script to use. We’ll take a look to Javascript first, then we’ll create a little project using also Python to inject automatically the script.
It’s worth to mention that some of the Javascript examples shown in the documentation are not working with the SIP enabled, but let’s take a look to this code:
const { NSSound } = ObjC.classes; /* macOS */
ObjC.schedule(ObjC.mainQueue, () => {
    const sound = NSSound.alloc().initWithContentsOfFile_byReference_("/Users/oleavr/.Trash/test.mp3", true);
    sound.play();
});
Why is this an interesting example ? If we look at the path used which is /Users/oleavr/.Trash/test.mp3 and we get to the directory Users with the terminal which is using a theme like powerlevel10k we can see there’s a lock icon:

We already know which folders are protected thanks to the Apple documentation, but what if we want to check a specific folder to be sure ? We can use ls for that and look for restricted:
$ ls -lO /Users
which prints:
drwxrwxrwt  26 root         wheel  -  832 Feb  9 10:39 Shared
drwxr-xr-x+ 93 yourusername  staff  - 2976 Mar 30 20:18 yourusername
So the directory is not protected, but to write anything inside this folder, you need to run a command as sudo. On the other hand, if we inspect System, we get that everything is restricted, and thus protected by the SIP:
drwxr-xr-x   43 root  wheel  restricted 1376 Feb  9 10:39 Applications
drwxr-xr-x    4 root  wheel  restricted  128 Feb  9 10:39 Cryptexes
drwxr-xr-x@   2 root  wheel  restricted   64 Feb  9 10:39 Developer
drwxr-xr-x    5 root  wheel  restricted  160 Feb  9 10:39 DriverKit
drwxr-xr-x  146 root  wheel  restricted 4672 Feb  9 10:39 Library
drwxr-xr-x   14 root  wheel  restricted  448 Feb  9 10:39 Volumes
drwxr-xr-x    5 root  wheel  restricted  160 Feb  9 10:39 iOSSupport
So even using Frida as sudo doesn’t allow you to access the Users folder. One solution to this issue is to move the .mp3 in another folder such as tmp which doesn’t have any restrictions nor it does require sudo to access its content. To copy the file to tmp use this command as an example:
$ cp /Users/changeusername/.Trash/trash.mp3 /tmp/trash.mp3
Let’s use Safari as an example (remember to use the correct PID when invoking Frida instead of the process name), this line of code will simply use a Objective-C function to play an .mp3 file:
ObjC.classes.NSSound.alloc().initWithContentsOfFile_byReference_("/tmp/trash.mp3", true).play();
If everything worked as expected, you should hear the audio playing which is using the process attached by Frida.
But how do I inject the whole script ? Create a javascript file like:
const { NSSound } = ObjC.classes; /* macOS */
ObjC.schedule(ObjC.mainQueue, () => {
    const sound = NSSound.alloc().initWithContentsOfFile_byReference_("/tmp/trash.mp3", true);
    sound.play();
});
then use this command to inject the script into the process of your choice (you can also use the PID instead of the process name):
frida -l myscript.js firefox
Use Python to remove repetitive tasks
Many things we’ve done till now can be repeated a lot of times, but what if we just create a script to do everything for us ? That’s where Python comes in handy!
Let’s create a folder with two files, one containing our Python script, we can name it as main.py:
import os
import sys
import frida

_SCRIPT_FILENAME = 'myscript.js'

def on_message(message, date):
    """Print received messages."""
    print(message)

def main(process_name):
    with open(_SCRIPT_FILENAME, 'r') as script_file:
        code = script_file.read()

    session = frida.attach(process_name)
    script = session.create_script(code)

    script.on('message', on_message)
    script.load()

    print("[!] Ctrl+D or Ctrl+Z to detach from instrumented program.\n\n")

    sys.stdin.read()
    session.detach()

if __name__ == '__main__':
    main(sys.argv[1])
and the other containing the Javascript code to inject, we can name it myscript.js:
const { NSSound } = ObjC.classes;
ObjC.schedule(ObjC.mainQueue, () => {
    const sound = NSSound.alloc().initWithContentsOfFile_byReference_("/tmp/trash.mp3", true);
    sound.play();
});
Let’s take a quick look to the Python code:
def on_message(message, data):
    """Print received messages."""
    print(message)
it is based on the example shown on Frida Basics although some functions were not working on macOS, so I changed it a bit to make it work. It is pretty straight forward, but just to give you a quick overview, we have the on_message callback which will receive the messages from the script, we will just print them and avoid handling them. We then create a session and attach Frida to the process we want to debug using:
session = frida.attach(process_name)
After we created the session as mentioned on Frida Basics, we can:
assign how each callback will be handled (for now, just the message one) with
.on(event, callback)- When we are finished assigning callbacks we can load the instrumentation script. When we have finished with everything, we can calldevice.resume(pid)to resume the process and instrumentation will begin. When we are doing, we can call session.detach to detach from the instrumented process and revert any instrumentation (hooks will be reverted).
In the terminal, simply type python3 main.py Firefox to run the script. You should be able to hear the .mp3 playing in the background, remember to move it in /tmp if you’ve not already done so. To stop the audio playing, you need to quit the process 😀
TLDR
There are not many available resources to use Frida on macOS but the process is pretty similar to iOS, although the SIP doesn’t really help to do a lot of things and disabling it doesn’t seem to be the best solution. So avoid disabling the SIP unless there’s no workaround for the application you’re debugging.