Playing Windows games on macOS can be tricky, especially if the game requires more than a few tweaks to make it work. I was checking the Apple Gaming Wiki but some information is missing or incorrect to get a game running. Use the wiki as a reference but do your own research to find out how to run a specific game.
It is possible to play God of War on macOS but only if you reverse the exe file and you patch a few assembly instructions. This method has been shared by the developer Nas and Andrew Tsai made a video about God of War.
Regarding the tools, you need CrossOver to run the game and the free version of IDA Pro to patch the file.
Remove checks for Windows 10
Launching the game through Steam will result in an error:
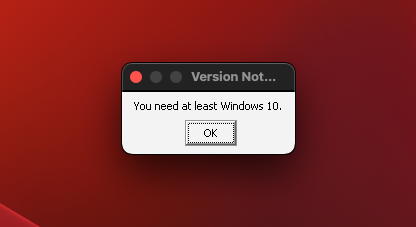
Even creating a Windows 10 bottle does not solve this issue so the only way to get the game working is to patch the exe. Navigate to your God of War directory, drag and drop GoW.exe in IDA Pro after clicking on Go Work on your own, you can easily access the directory by right clicking on the Steam bottle or another bottle that you are currently using in CrossOver, to open the C: Drive in Finder.
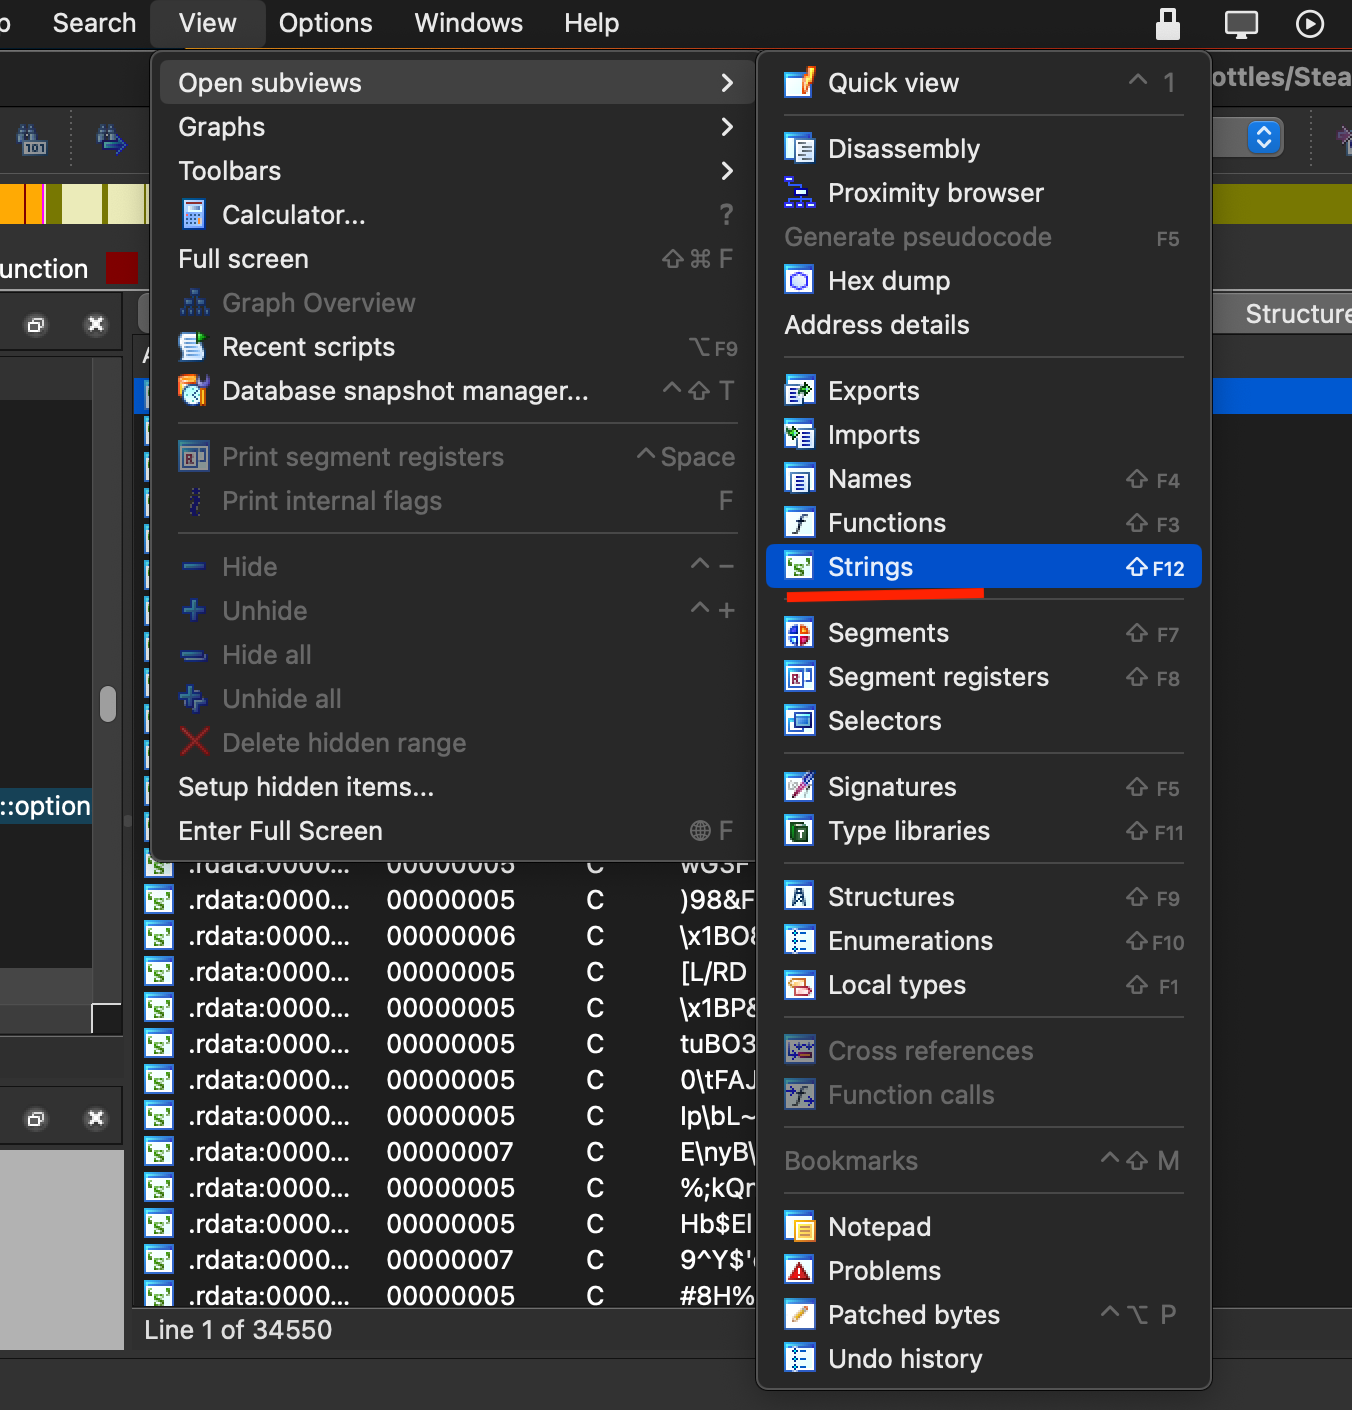
After the file has been loaded in IDA Pro, open the Strings subview in the App Menu:
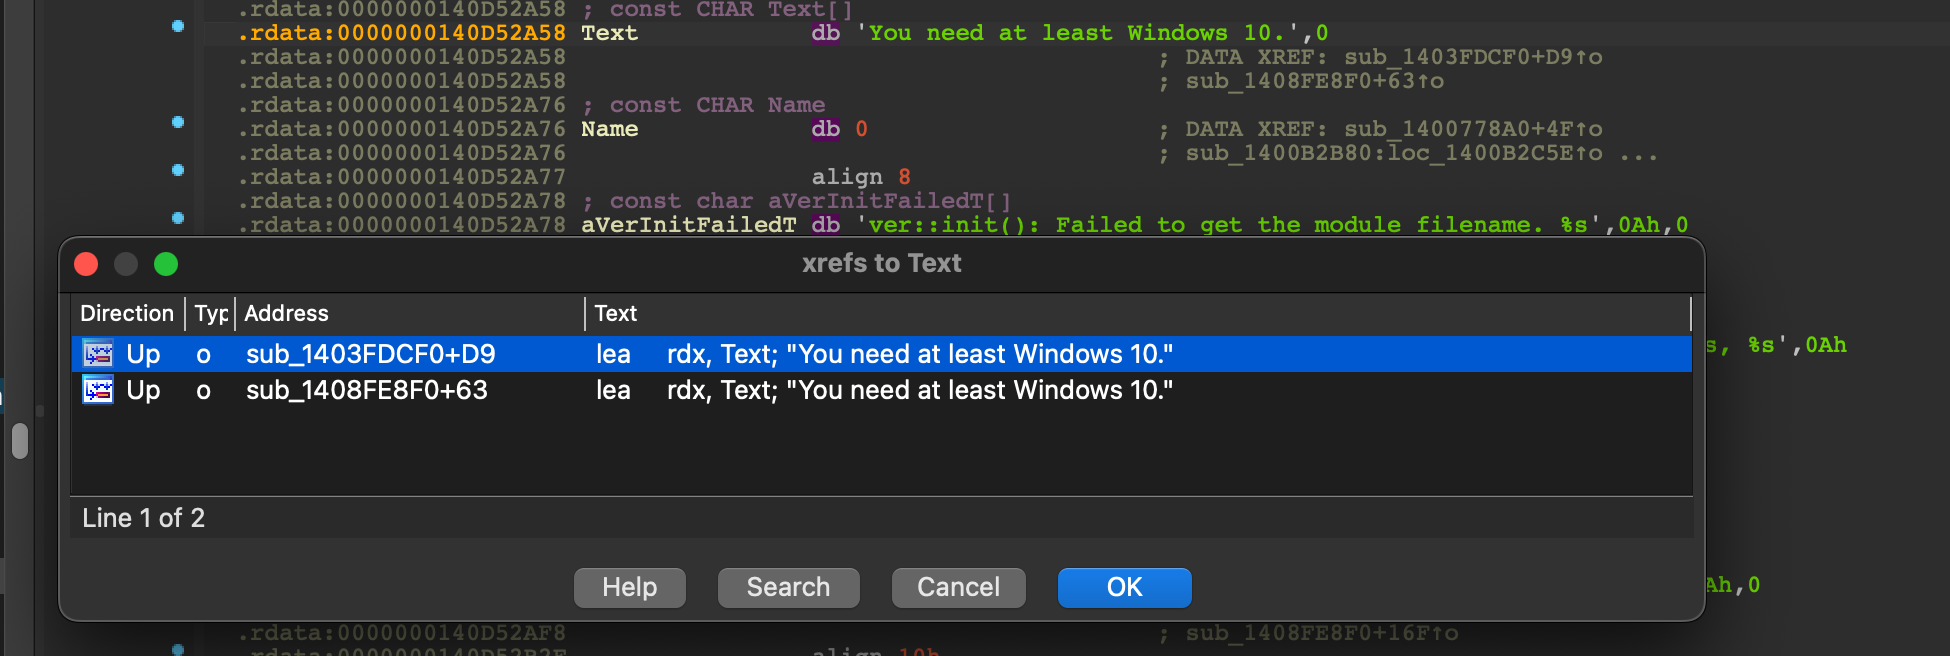
Right click in the view to select Quick Filter, a text box will appear at the bottom, type the error “You need at least Windows 10” to filter the results:
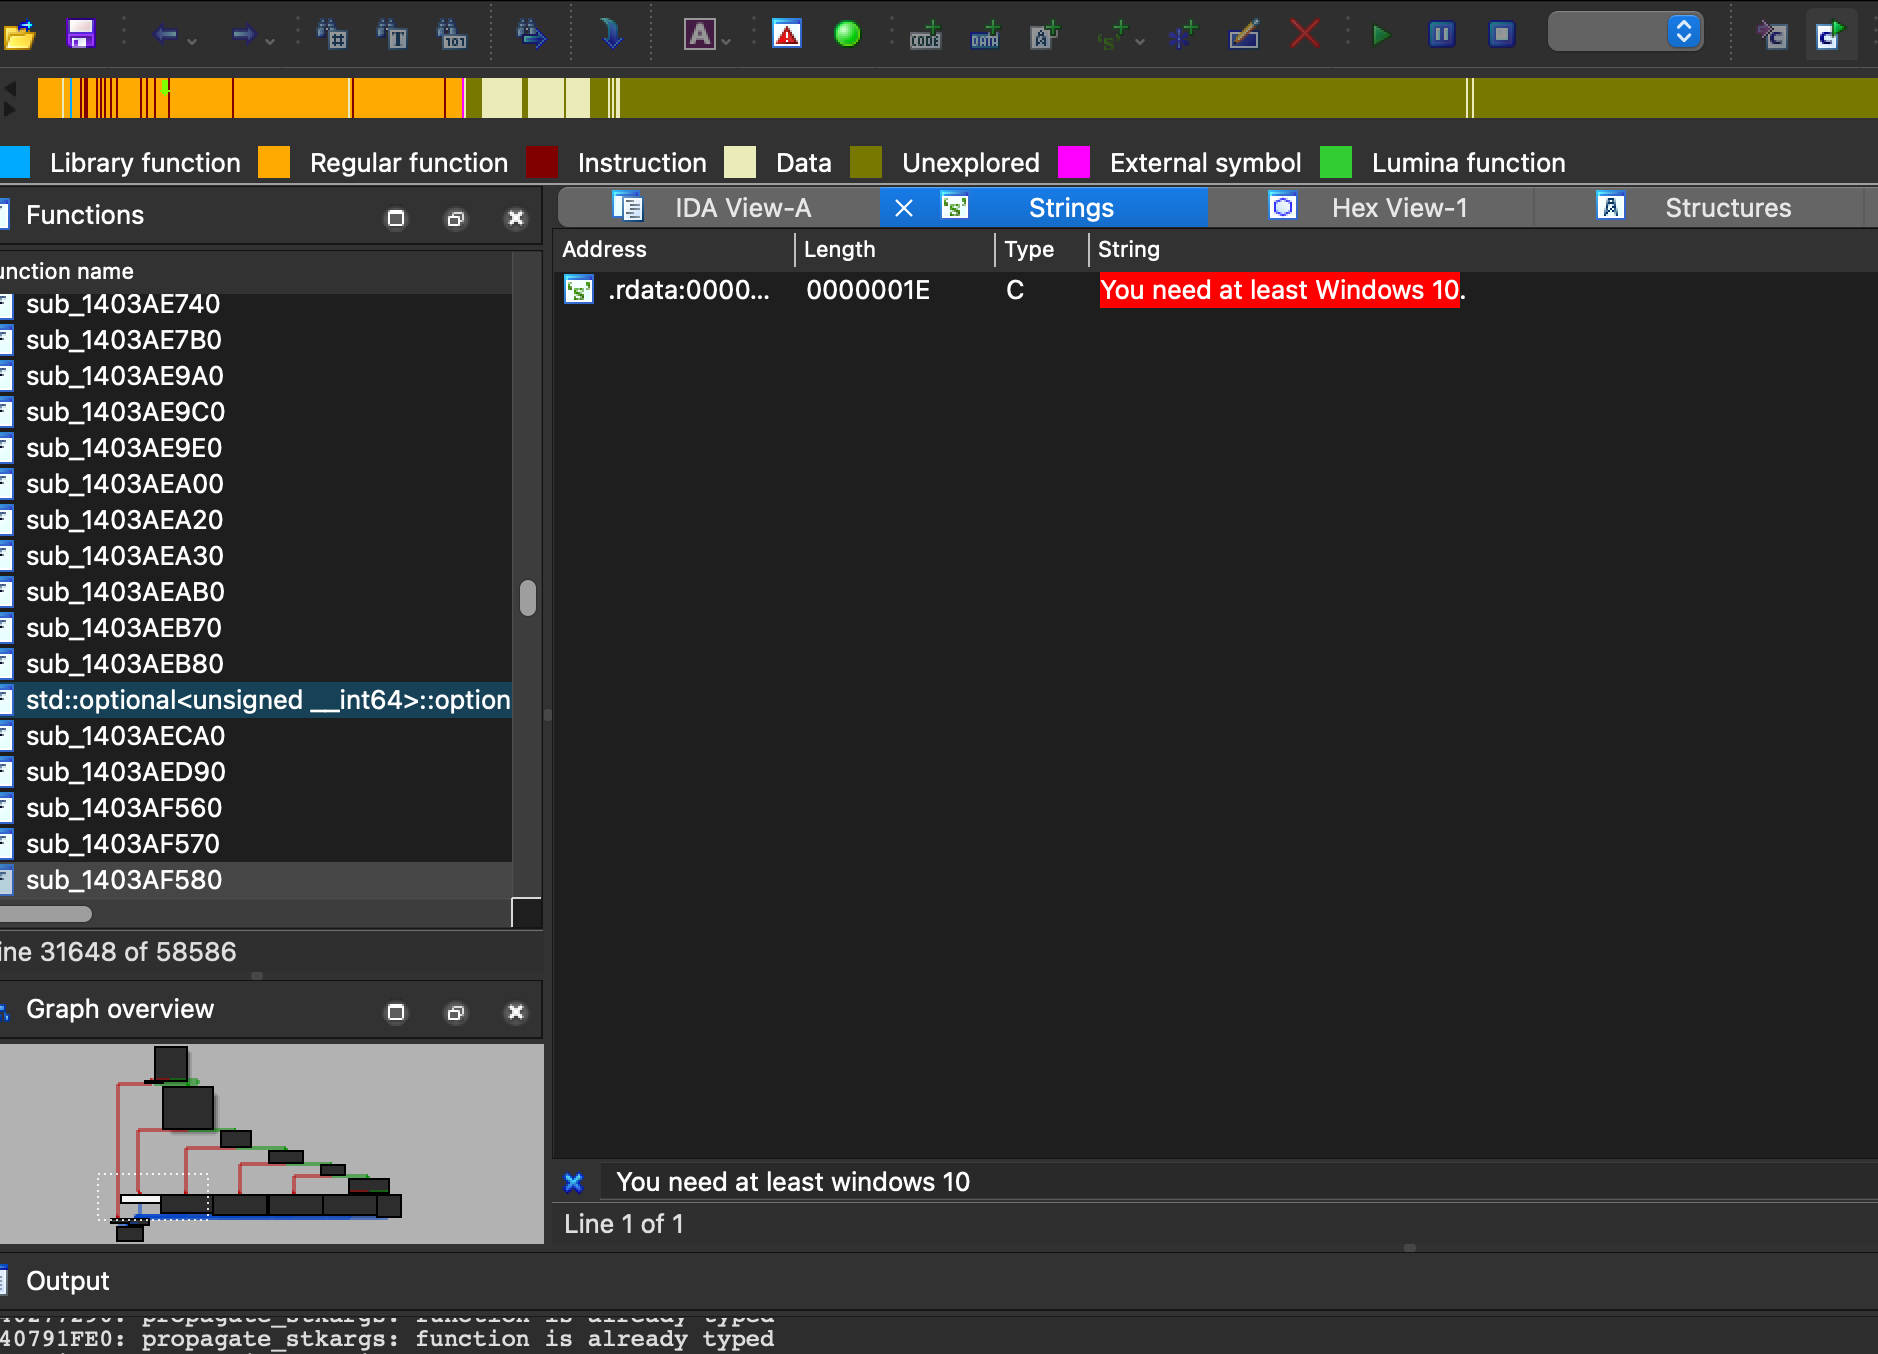
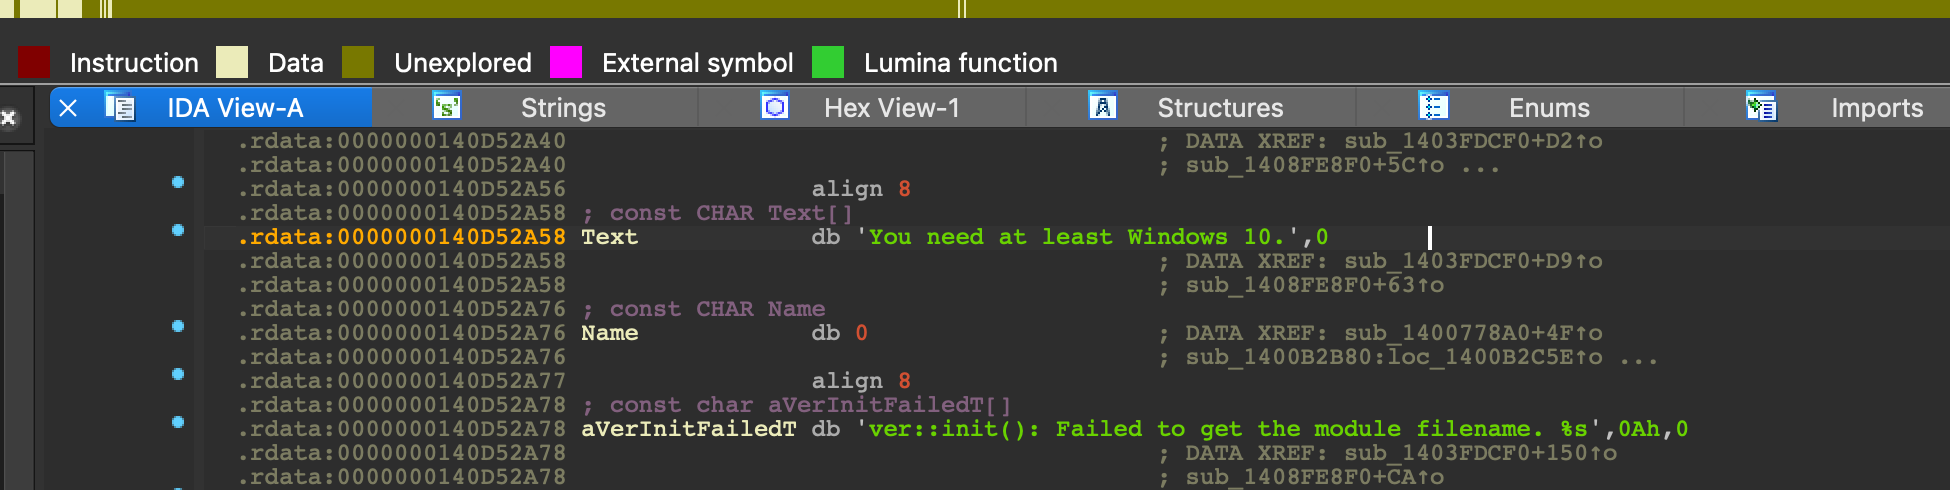
Double click on the only displaying result, you should be in the text view with an instruction being highlighted:
Right click on it to select “List cross references to…” and pick the first option:
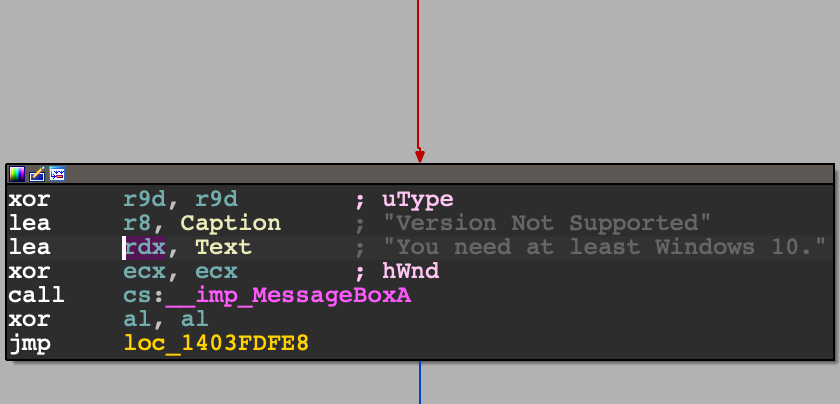
Now you should be in the Graph View, double click on the arrow right on top the following Group Nodes to go the jnz instruction that we need to change:
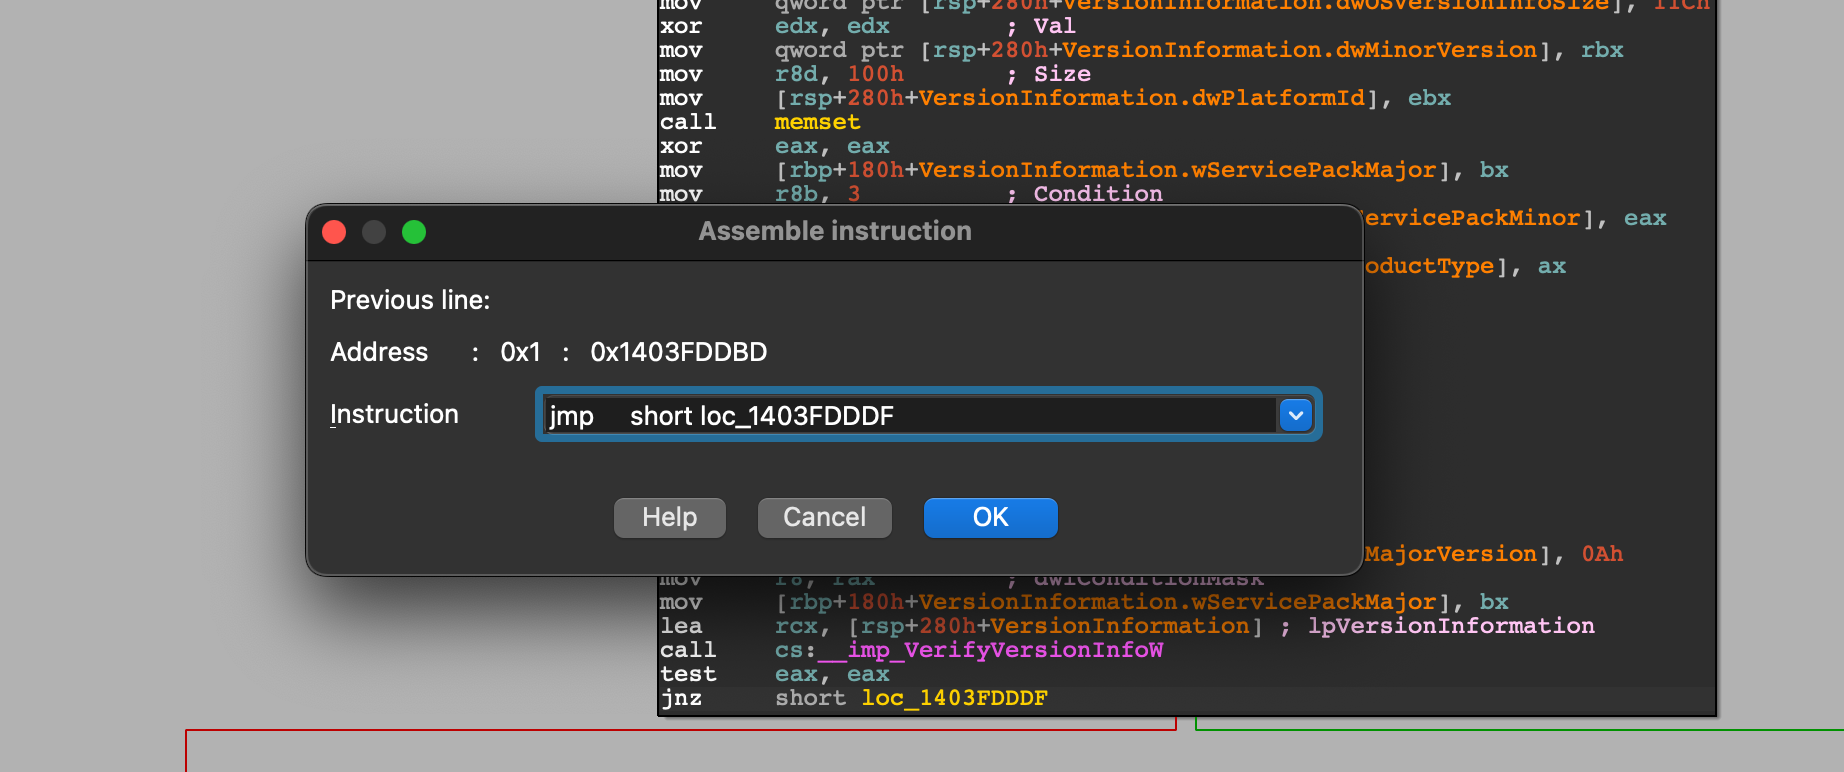
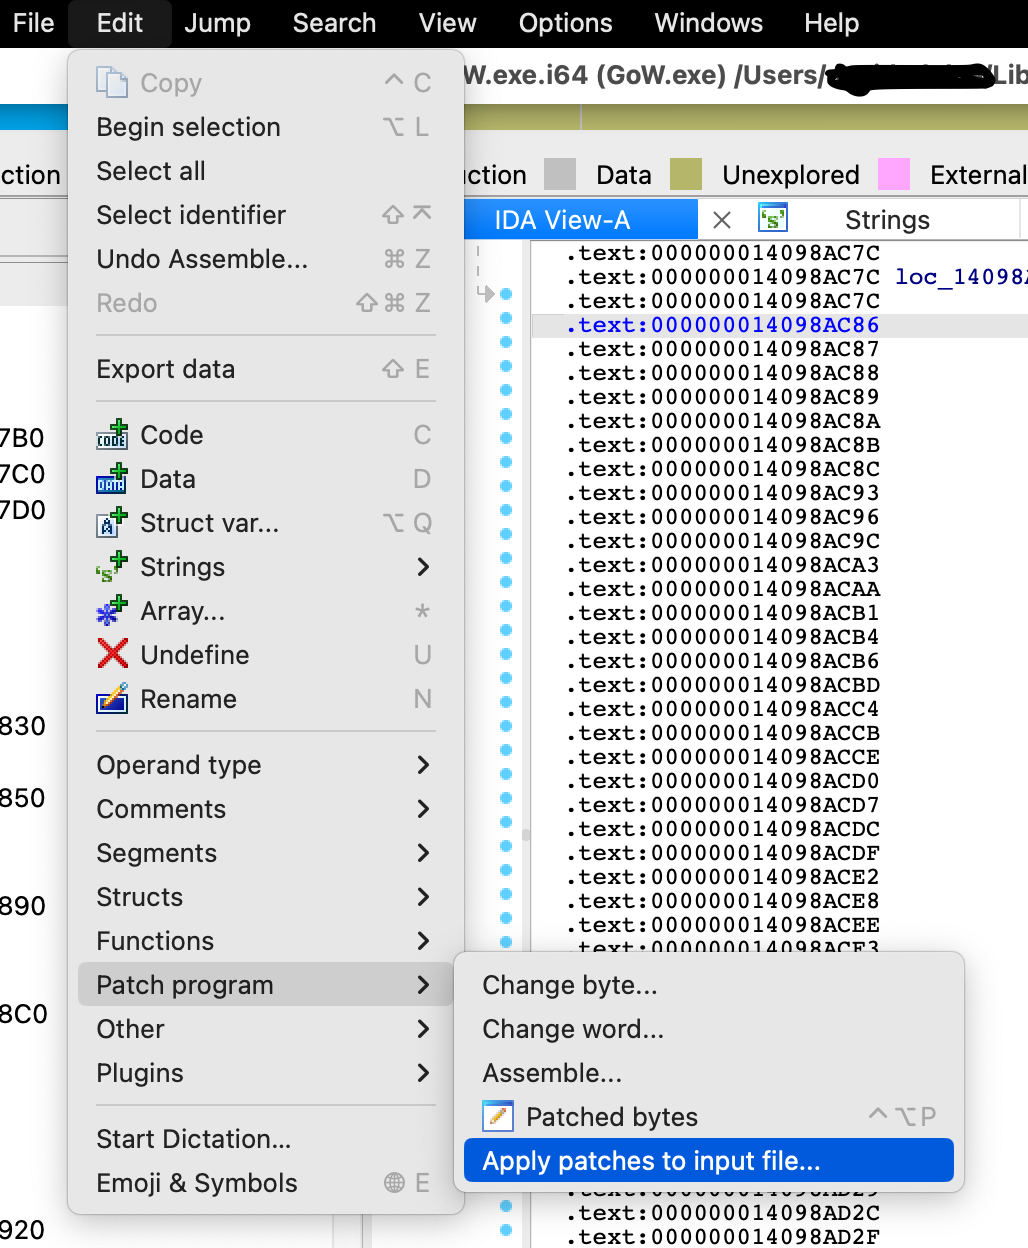
To patch the jnz instruction, simply click on it, after that in the App Menu click on Edit -> Patch program -> Assemble...:

Replace jnz with jmp to skip the check for Windows 10:
After clicking OK, a few popups will come up asking you to patch other instructions, since we only needed to change the jnz instruction you can ignore them.
We still need to patch one more jnz regarding the Windows 10 error, go back to Strings subview and search again for the error, right click on the line and select “List cross references to…” this time we are interested in the second instruction of the two. Trace back to jnz and patch it with another jmp as you did before. If you did everything correctly, you should see in the subview Patched bytes two addresses being changed:

Remove checks for Direct3D
If you patch and launch the exe you will get another error:

So the first two checks for Windows 10 are patched, but we still need to remove two more checks regarding Direct3D to run the game. Open again the Strings subview and filter the message showed in the above screenshot, double click on the only line being displayed, right click to list all the references and pick the only option available. You should be in the following Group Nodes:

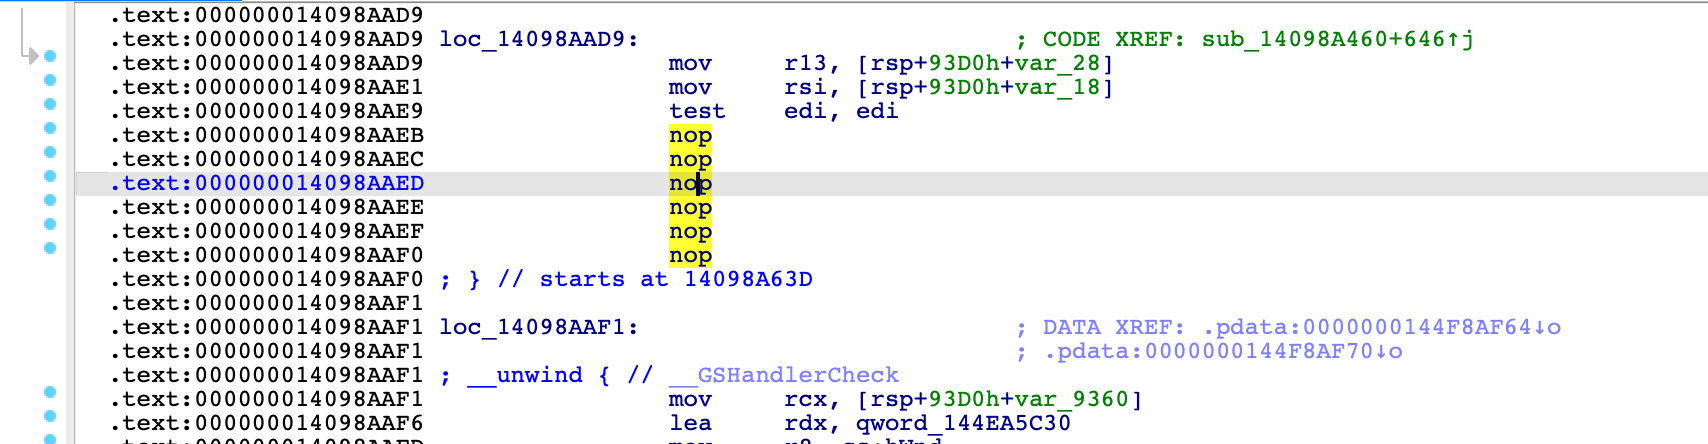
Right click on the first instruction, select again “List cross references to…” and pick the only option available. Right click on the Group Nodes to switch to text view, patch the js instruction by removing it completely and typing nop instead:

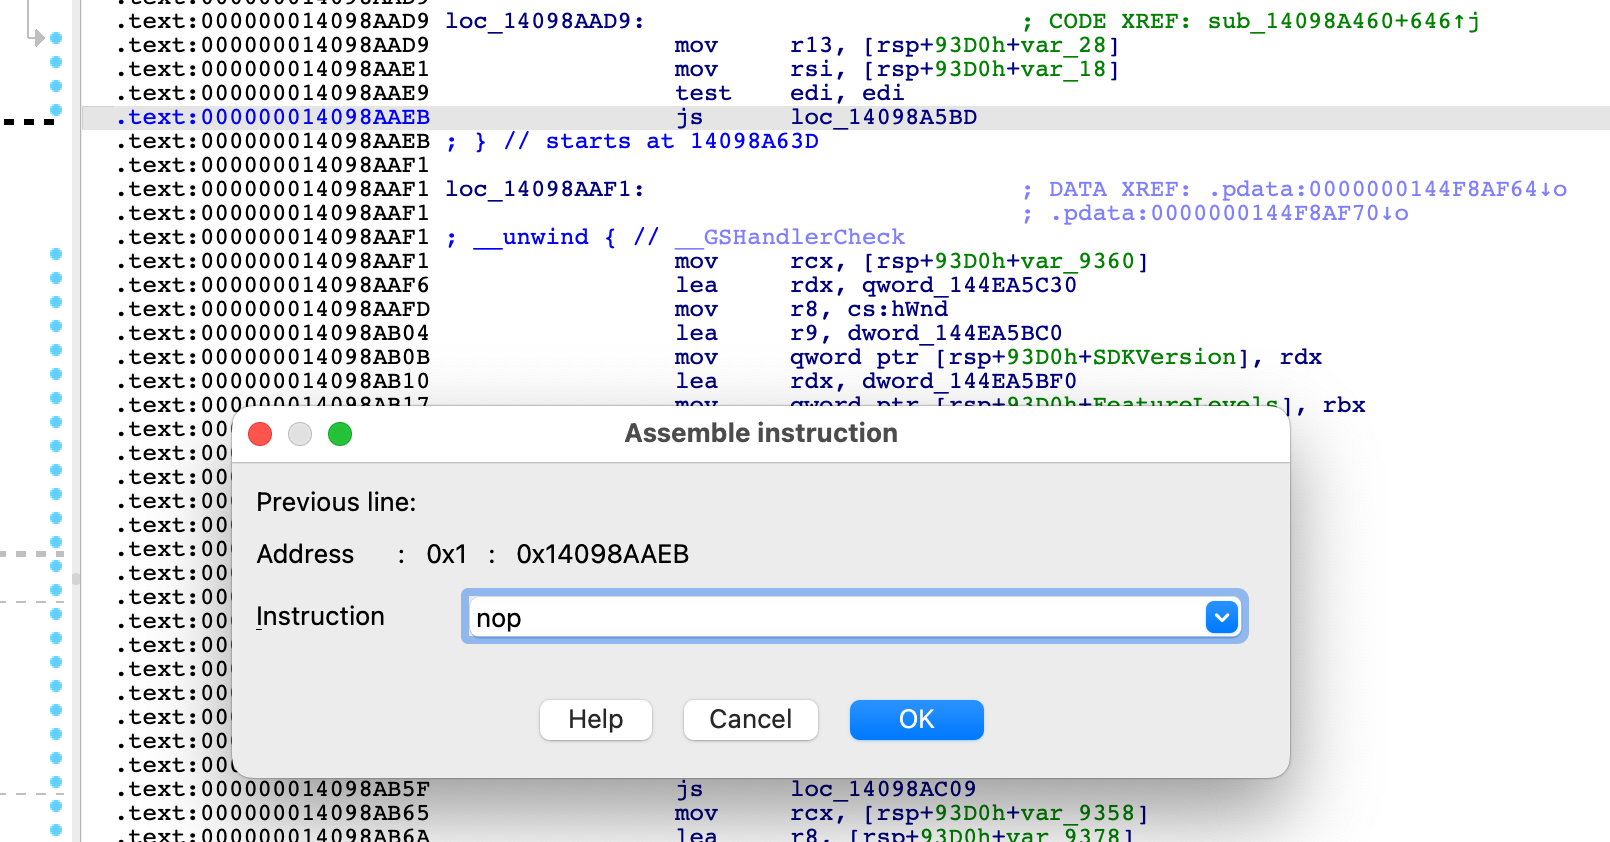
Type nop in the upcoming popups until all the yellow addresses on the left are gone. You should get this result:
We need to repeat the same steps one more time, so go back to Strings subview typing the same error message if it is not already being highlighted, right click to list cross references, select the only option available and this time patch the jl instruction. You should get the same result in the above screen, you should also get 4 different addresses with the following bytes being patched:

Click on the IDA View tab and click on Edit in the App Menu to apply patches to input file:
Use the default settings to generate the output file, in the output window there should be a line saying that the patches have been applied:
Applied 14/14 patch(es)
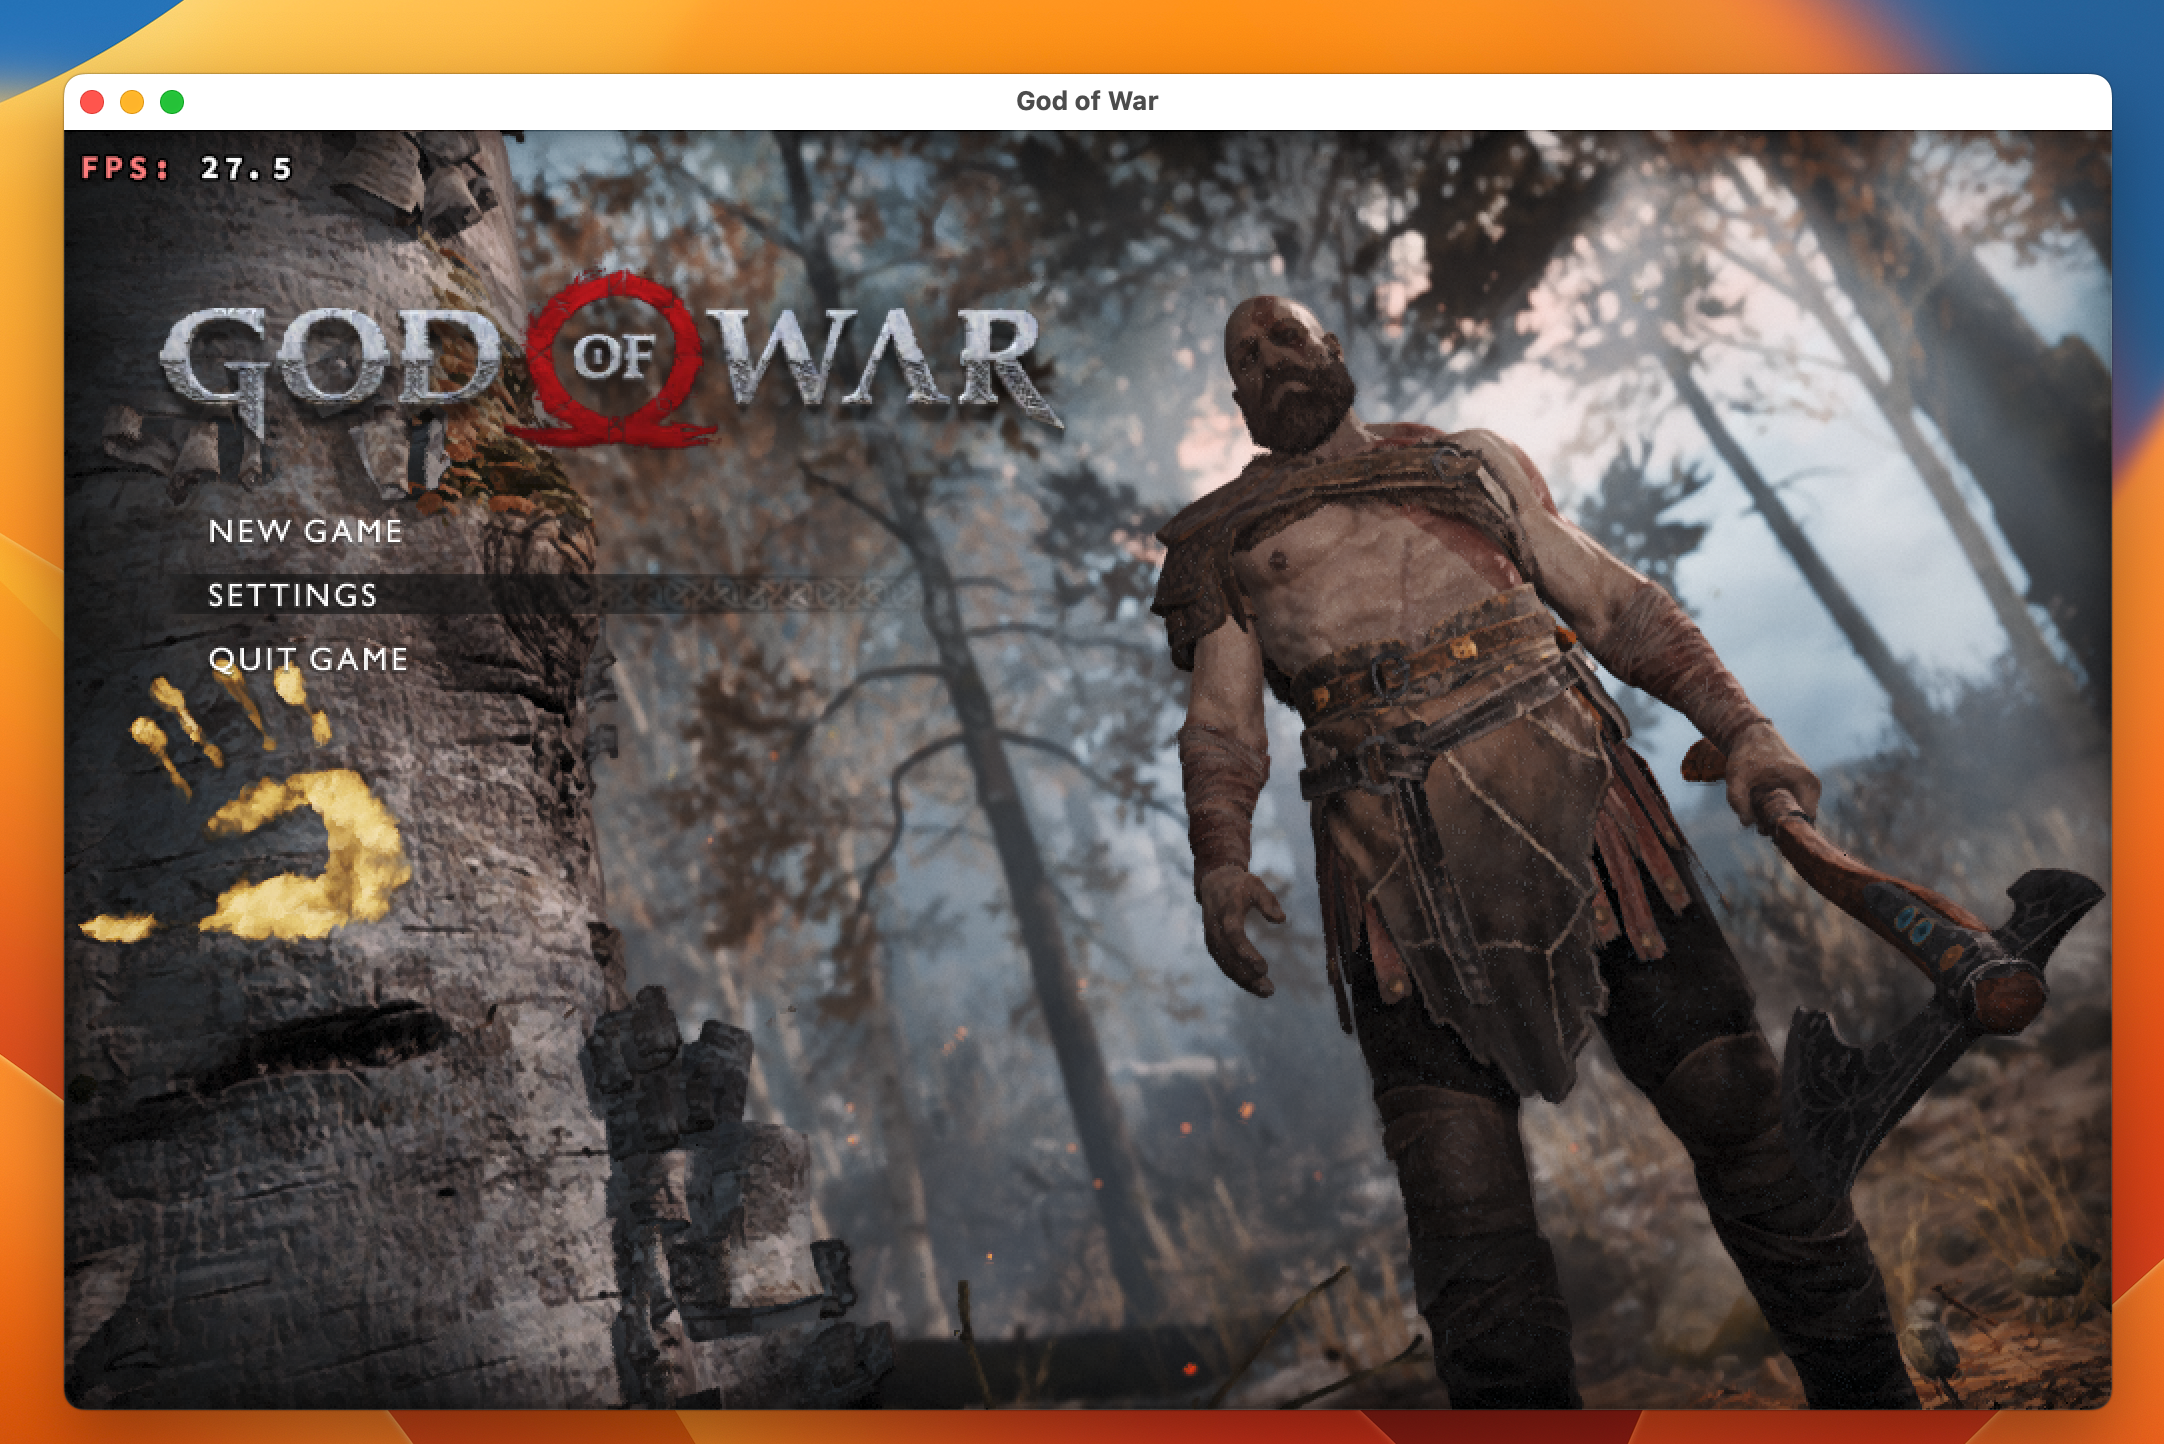
You can finally launch the game through crossover and this time, no errors will show up:
TLDR
Although there was already the video made by Andrew Tsai showing how to patch the game, I still wanted to understand how Nas found the instructions to patch the game. In this case it wasn’t too complicate, just look for the strings in IDA Pro and patch all the instructions leading to Group Nodes responsible to trigger the errors. But it’s still nice to practice a bit on these challenges just to see how things are done and if you can also repeat the same steps to get an application running after applying small patches.