In one of my older posts which you can find here, I talked about the different tools to virtualize an OS on the Apple Silicon MAC and I declared a winner which was Parallels. From the moment the latter is the best tool to virtualize an OS at the moment, I decided to reverse some x86/x64 bit applications. Even if we are on Windows ARM, most of these applications will work perfectly thanks to a translation process, which is very similar to Rosetta 2.
What tools are currently working ?
x32dbg has some issues, as soon as I attached it to a x86 bit process or I opened an exe, it immediately crashed. On the other side, x64dbg is working pretty well. An alternative to x32dbg is of course OllyDbg but the official version doesn’t have the necessary plugins to unpack a malware or to prevent it from being detected by an anti debug. I used this version on Github which contains the most useful plugins.
Some other tools that I used and are currently working:
Things that we need
The first thing that you should do is to isolate your VM from your MAC by checking the selected checkbox:
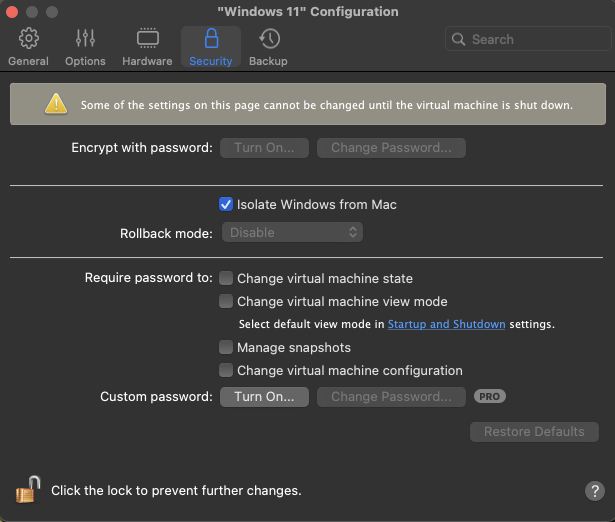
By default, Parallels will share your VM folders with your MAC and it’s better to isolate everything from your host machine, especially if you’re working with malware samples. Not only that, many folders will be related to your MAC as shared folders and they’ll have a path like //MAC//…//Downloads and some applications will not work correctly. So in this case isolating your MAC from the VM will make your life easier.
These are the tools that we need:
- OllyDbg with the best plugins
- Scylla - x64/x86 Imports Reconstruction
- UPX
- Bintext as the malware sample, which will be packed with UPX
- Parallels with Windows 10 or 11
An overview of UPX
After you downloaded UPX, simply add its folder to the environment variables of Windows or open the command prompt and navigate to its folder. It’s not very complicate to unpack UPX from the moment it can be also be removed from an executable by running the following command from the command prompt:
C:\> upx -d bintextPacked.exe -o bintextUnpacked.exe
However from the moment we are here to learn it is better to unpack an exe with a debugger, to see how it works behind the scenes. Let’s run this command to pack bintext:
C:\> upx -9 bintext.exe -o bintextpacked.exe
Even if it is simple to unpack an exe packed with UPX, the latter is often used by malware authors to bypass detection by antivirus signatures.
Find the OEP with OllyDbg
As soon as we launch the packed exe in OllyDbg with administrator privileges, we can see that the first instruction being used is PUSHAD which is simply going to push the contents of the general-purpose registers onto the stack. It is also commonly used with POPAD.
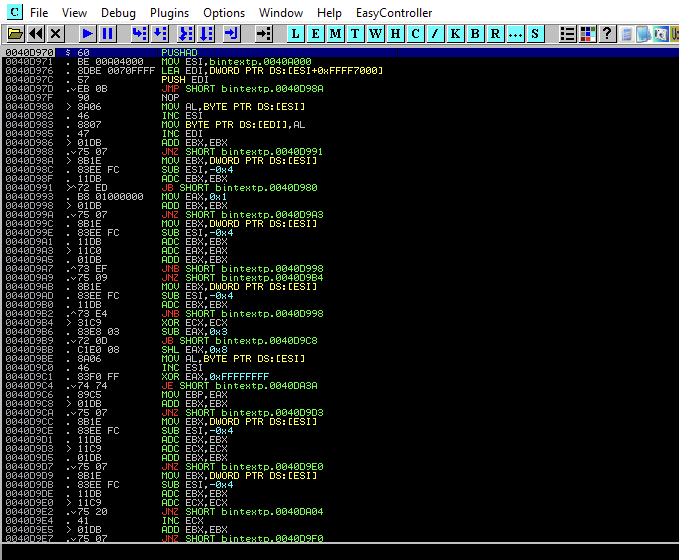
Instructions displayed in OllyDbg
Now to unpack the exe, we simply need to scroll down until we hit a jump followed by a bunch of zeroes as shown in this example:
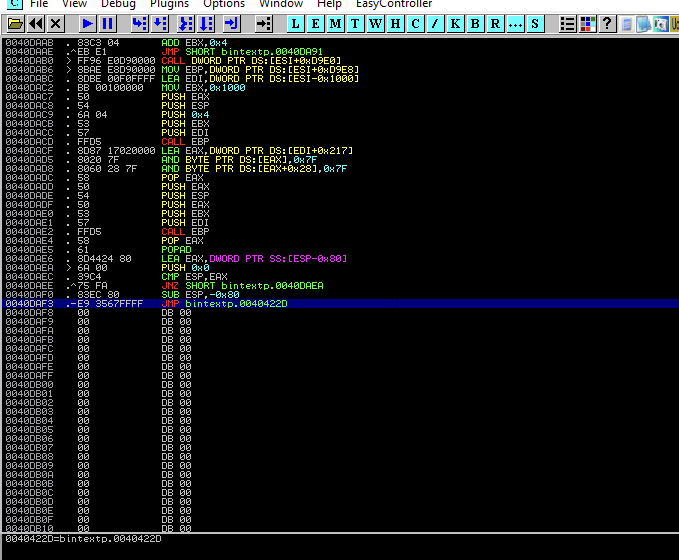
We can put a breakpoint on this jump with F2 by clicking on it, after that we press F9 to execute the code until it reaches this jump. Press F7 and you should get the following set of instructions:
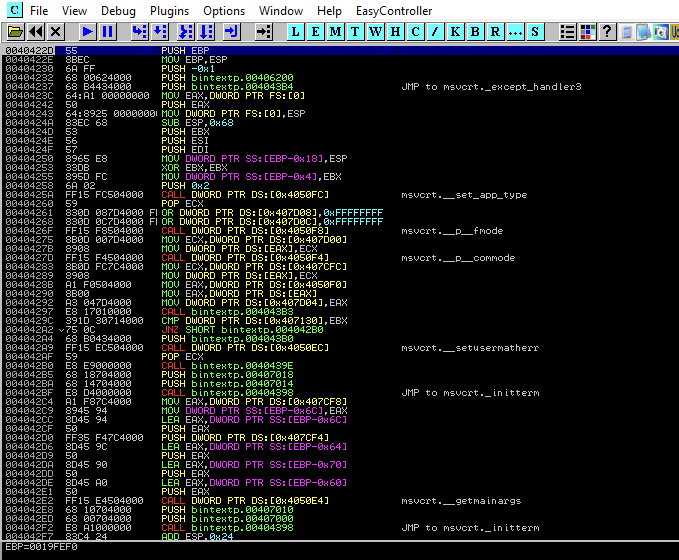
The first instruction PUSH EBP is the OEP (original entry point) that we need to dump and fix the IAT (import address table) with Scylla.
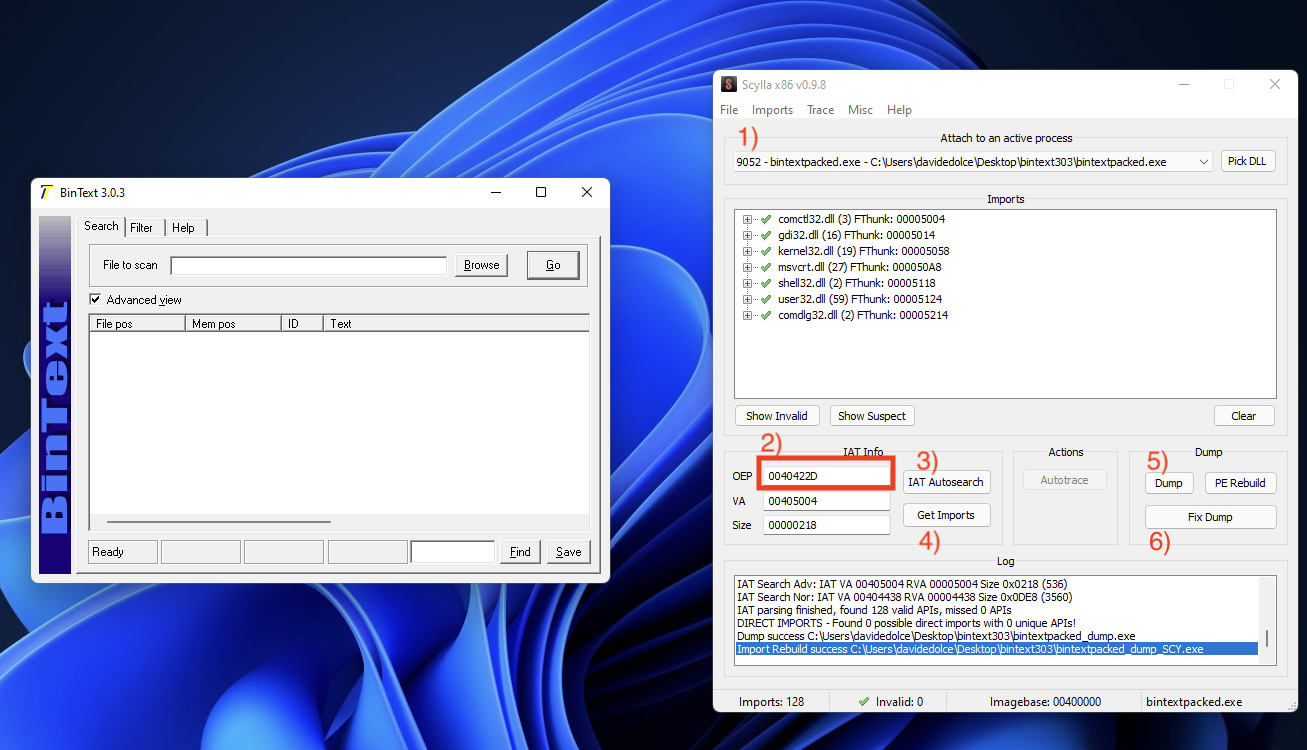
Dump the exe and fix the IAT with Scylla
At this point we found the OEP, let’s copy its address to the clipboard and open the x86 version of Scylla along with the packed exe. We can close OllyDbg from the moment we don’t need it anymore. Follow these steps to complete the unpack process:
At this point we can open the unpacked exe successfully!
TLDR
As you can see it is not complicate to unpack UPX and many of the reverse engineering tools are perfectly working with Parallels on the ARM architecture. I only isolated Parallels from my MAC and I left the other default settings unchanged. If you need to debug x64 bit applications, you can safely use x64dbg.